Sorry if I thoroughly depressed anyone in my last post. I met a friend in my local town centre on Sat and she confirmed the depressive nature of it…she even mentioned that my words may have muted any broodiness she has been feeling of late (what with my fear for the next generation being brought up in WW3)…so apologies again, stopping people wanting to have kids through fear of the future was def not my intention!
I, as you would of guessed, was having a terrible week and was suffering badly from anxiety surrounding issues of the world (where one let’s world-wide problems monopolise their thoughts and worries). Add to the terrorists threats, I had also been following the Izzy Dix story on Radio One, which had a focus on online bullying and how it had been a contributing factor to this 14 year-old’s tragic suicide…who are these arsehole trolls or keyboard gangsters who sit goading impressionable people to do such things…???
So I had to calm myself a bit and in doing so, turned to crafts over the weekend (yes you heard right, that was crafts)…
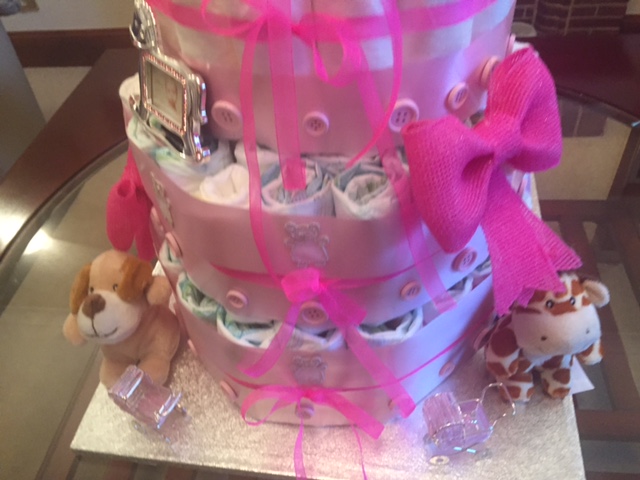
A cake made not of sugar and flour and icing, but of nappies…
My cousin’s Mads, Hayles and I are organising a baby shower for our cousin Dreanie in two weeks and so with my plan to have a chilled weekend, I wanted to make a few bits and bobs for the shower and keep myself on the straight and narrow (aka away from the gin/ red wine/ pineapple Ciroq – a new fave).
Having been scouring etsy, eBay, Amazon and Not on the High Street for different baby shower offerings, I landed upon the ‘diaper cake’ and so came the desire to give this to my cuz as a gift. Purchasing them from the aforementioned channels however, would cost up to £100 and so I thought I’d have a crack of it myself.
So here’s what you need to be a master nappy cake baker:
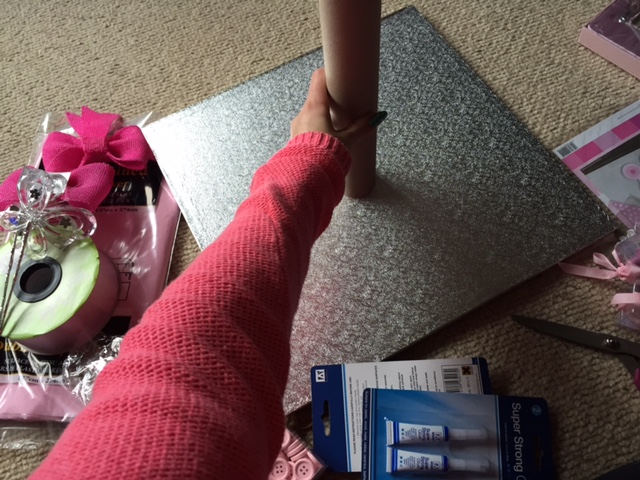
- A cake base – I went for a 16″ square base – if you are going for the 4 tiers don’t go any smaller than this
- Nappies – I used 107 nappies
- Ribbon (I went for a thicker baby pink silk effect ribbon, along with a thinner neon pink organza ribbon)
- Elastic bands
- The centre tube of a wrapping paper roll
- Superglue
- Double-sided tape
- Brown tape
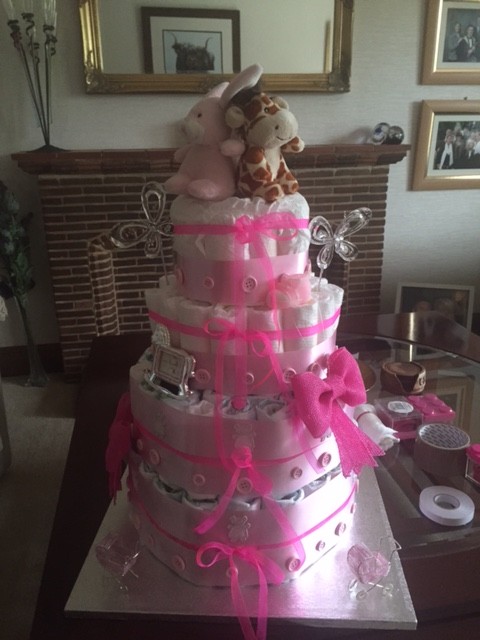
- Decorative accessories (I used buttons, small cuddly toys, baby shower trinkets like mini prams, bottle and booty candle, rocking horse frame, Christmas bow decorations, teddy bear material stickers)
Total cost – £70 (a cost that pretty much equates to what you can but from eBay, but at least this one is more personal.
I picked up all the cake decorations from Country Baskets, which has a good range of baby shower trinkets as well as vast amounts of decorative bits – literally for the crafty amongst us, this place is heaven on earth. I did not however pre-plan the aesthetics, planning anything or looking into the details for things, tends not to be how I roll (and more often than not leads to a troubled path), so I just decorated as I went with the stuff I picked up at Country B’s.
The Process
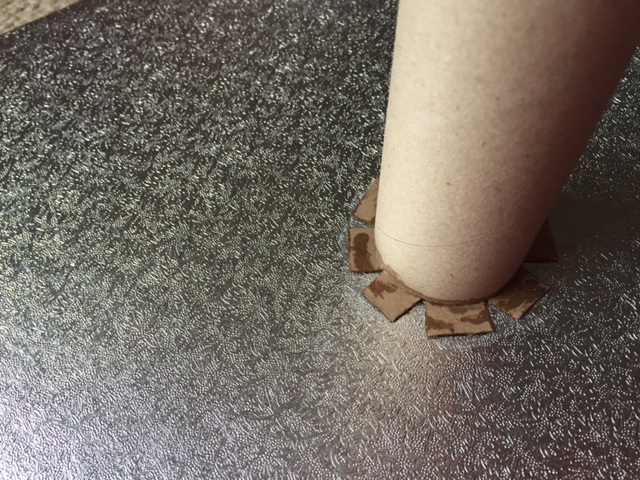
- The first challenge is to stick the wrapping paper tube to the cake base…the super glue I picked up from Country Baskets was in fact ‘super strong glue’, which seemed to stick nothing to nothing, with the exception of my fore finger and middle finger…
- So Lee suggested cutting the bottom of the tube and gluing the flaps to the base (hate the word flaps), but what with the glue being so balls, I ended up using trusty brown tape…
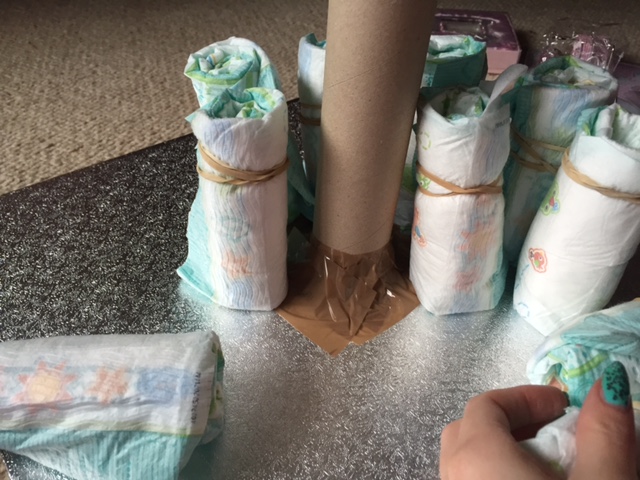
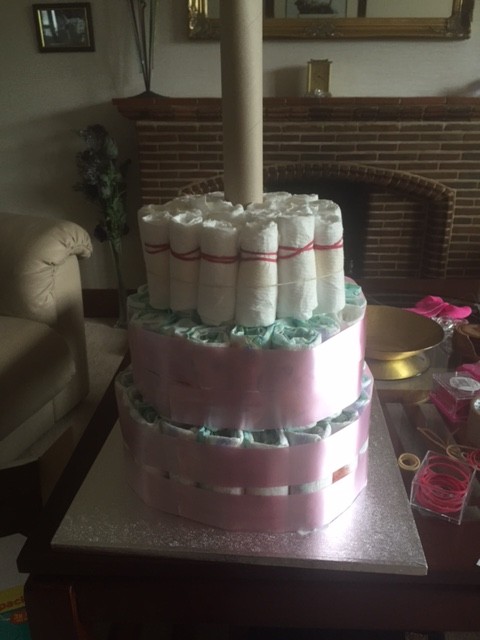
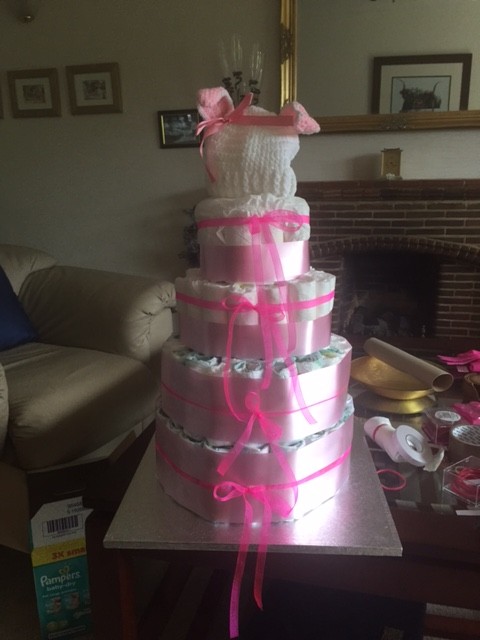
- The next step is to roll up nappies and use elastic bands to keep them together. Put the elastic bands on within 1.5 cm from the top of the nappy and roll up 6 at first, using elastic bands to keep them together around the tube, or use ribbon to tie them to the tube in a circle (I missed out this step for the base layer of the cake and had to go back and do it again, because the whole thing lacked the stability required for movement of the cake).
- With the first 6 being attached to the tube, remove the bands from the top of the nappies and then repeat this action with another 15 nappies, tying them around the full batch and securing to the tube.
- Finally, repeat again with a further 15-16 nappies and tie entire batch together around tube (I used a total of 36 nappies for the base layer)
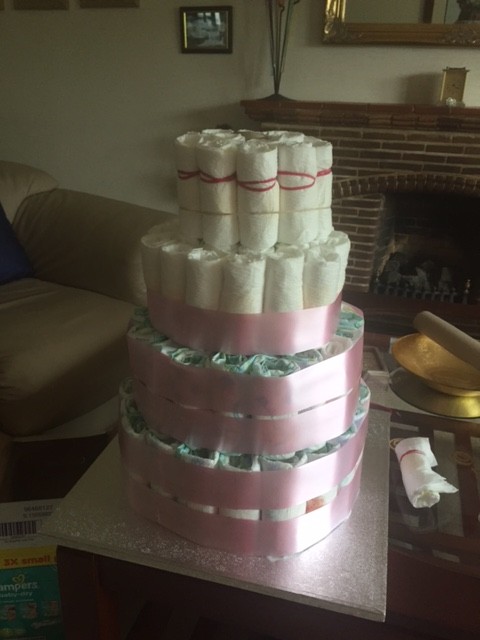
- Next, use your ribbon to secure the full base and also cover the ties (again I just used an exceptionally large rubber band and rolled this down to the bottom of the cluster of nappies and ensured the ribbon covered this). When it came to the ribbon, I decided to wrap this at the top and bottom of the nappies due to them being patterned and me trying to cover this slightly (using plain white nappies is advised, as it lends itself better to a colour scheme, mine of course being pink with Dreanie having a girl – not entirely convinced it wouldn’t be pink should she be having a boy too). To secure both ends of the ribbon I used double-sided tape.
- Now it is onto the next tier, repeat the action of rolling up 6 nappies, holding in place at the top with elastic bands, securing them to the tube with a a band or tied ribbon and then repeating for a further 12-14 nappies and then again with another batch this size – I used 33 nappies for tier 2 (and what with the over enthusiastic girth of the 2nd tier, my 3 tier cake had grown to a 4 tier).
- It was at this point my mum (aka Wee Lindy) stated that she just couldn’t visualise how the cake was going to come together aesthetically, but I carried on regardless, adding pink thick ribbon to my 2nd tier and commencing with the build of the 3rd.
- For my 3rd layer I used 25 nappies – be warned by this point, nappy cake hand cramp is likely to ensue.
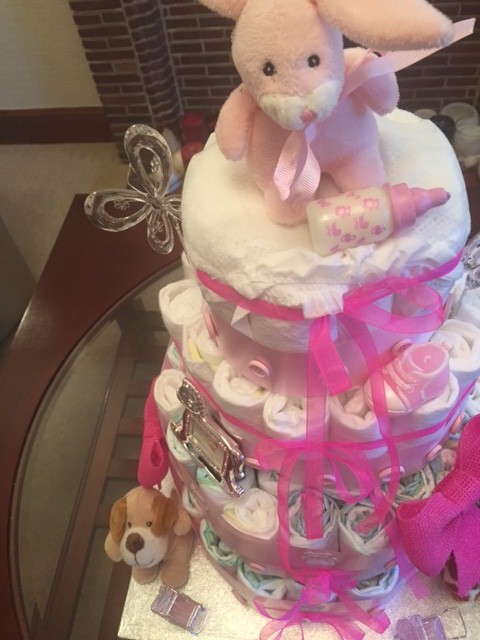
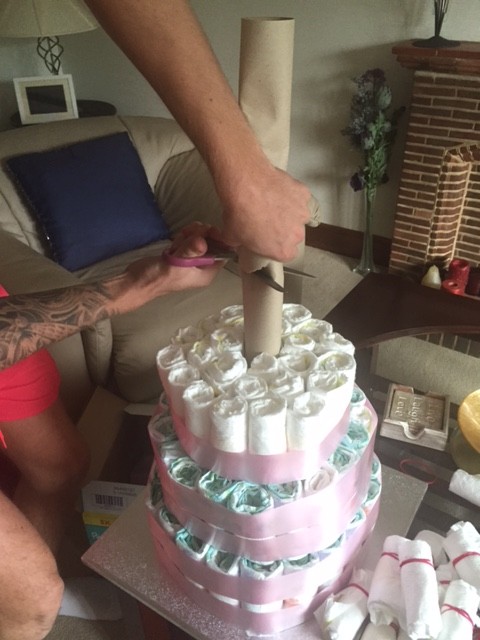
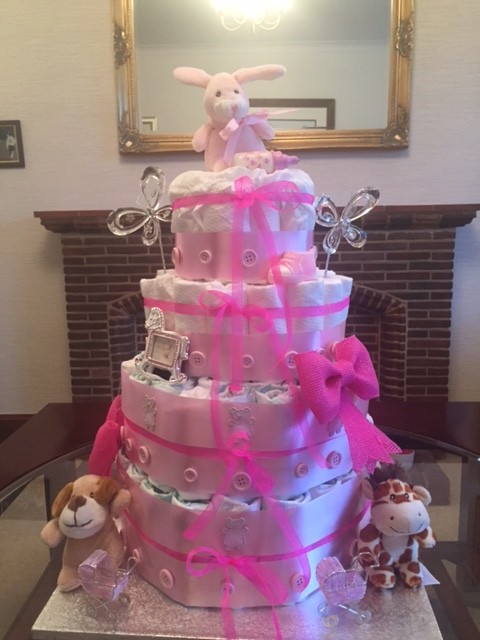
- Before building the final layer, my assistant (husband) who assisted not a jot and watched rugby all day, helped me cut the top of the tube to the height of the top tier. Now you’ll notice from the picture below, that the nappies on tier 3 differ from the mint green and jungle-themed pattern of the 1st and 2nd tier. This is down to the fact that layer 1 and 2 were made up of nappies for 3 months and above, whereas layers 3 and 4 were made for newborns, so they not only differed in pattern but in size. For more oomph go for the larger size of nappy.
- Next, it’s time to build the 4th tier and for this I used 13 nappies.
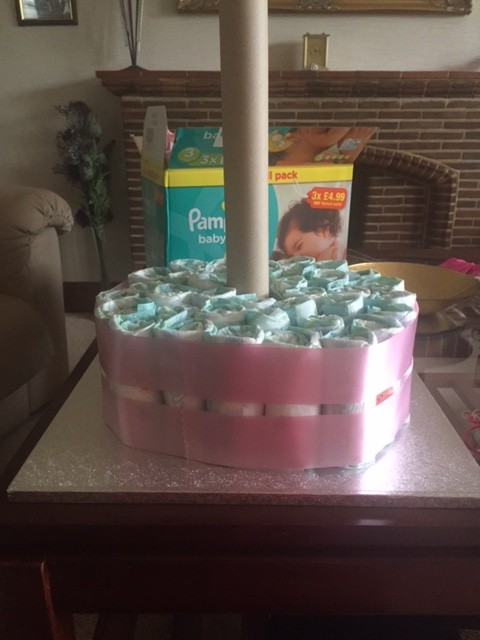
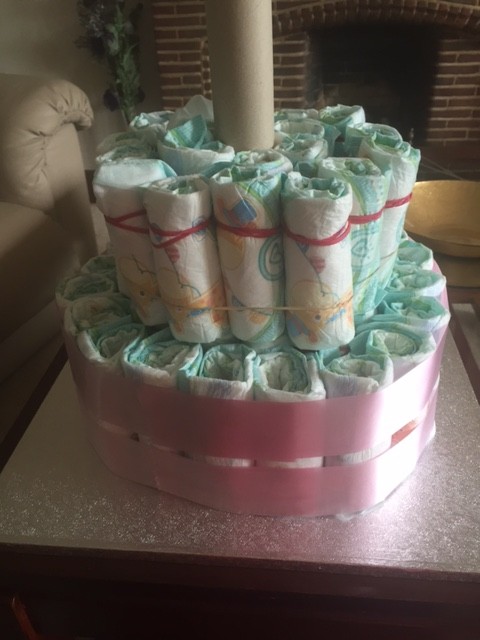
- I sealed the top of the cake with an open nappy that I secured to the top of the tier with the thinner neon ribbon. I then went down the rest of the cake adding the thinner ribbon for effect…
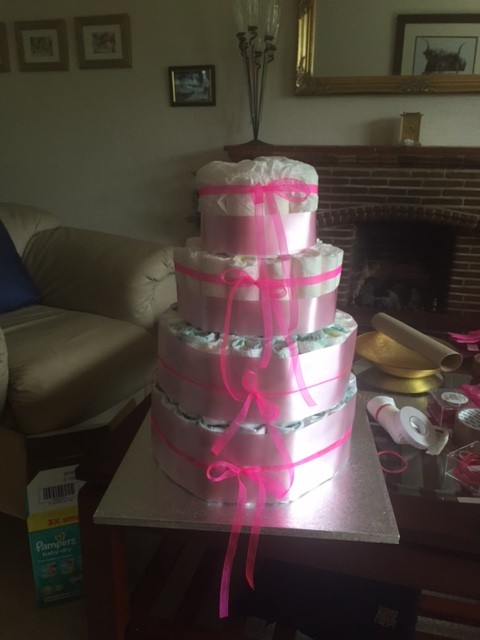
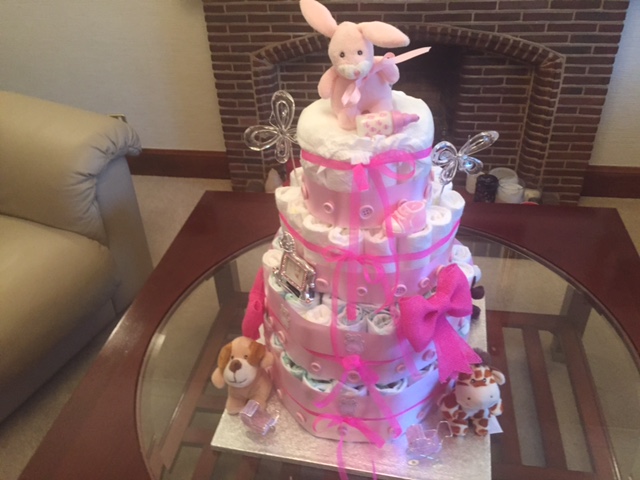
- Now comes the fun bit, decorating the cake and for this stage I had a lot of fun sticking buttons to my hands, hair (and face would you believe). I then used nappies to hold the pink ribbon decorations (which I am pretty sure are Christmas deccies) and the steps in the tiers to sit other trinkets (like the rocking horse frame). I also played about with a few options for a cake topper, but settled for a little pink bunny from Primark and a baby bottle candle from Country B’s.
- Finally add some decorations to the base of the cake and admire the finished piece…


Total build time – 4 hours (but you could certainly do it quicker with 3 tiers, less decor, or if you follow my advice and remember to secure each of the sets of nappies to the centre tube.
Ok, so on closer inspection it might be a bit rough around the edges and maybe some will say a tad, big fat gypsy baby shower cake, but I am pretty chuffed with the outcome. In terms of top tips and final thoughts, I would have to say…
- Aim to buy all white nappies
- Buy the same age-range of nappies to ensure they are the same size
- Go for larger nappies for extra va va voom
- Buy decent glue and don’t use this on your skin (if you get it on your hands, don’t then touch your face or hair, whilst holding a button also covered in glue)
- Make sure you have enough elastic bands to start with (I had to go back out and get some, and picked up a few boxes of pink bands for £1 each in Asda)
- Having someone close by to help secure ribbon is a big help
- Have fun with it and remember, it is the thought that counts
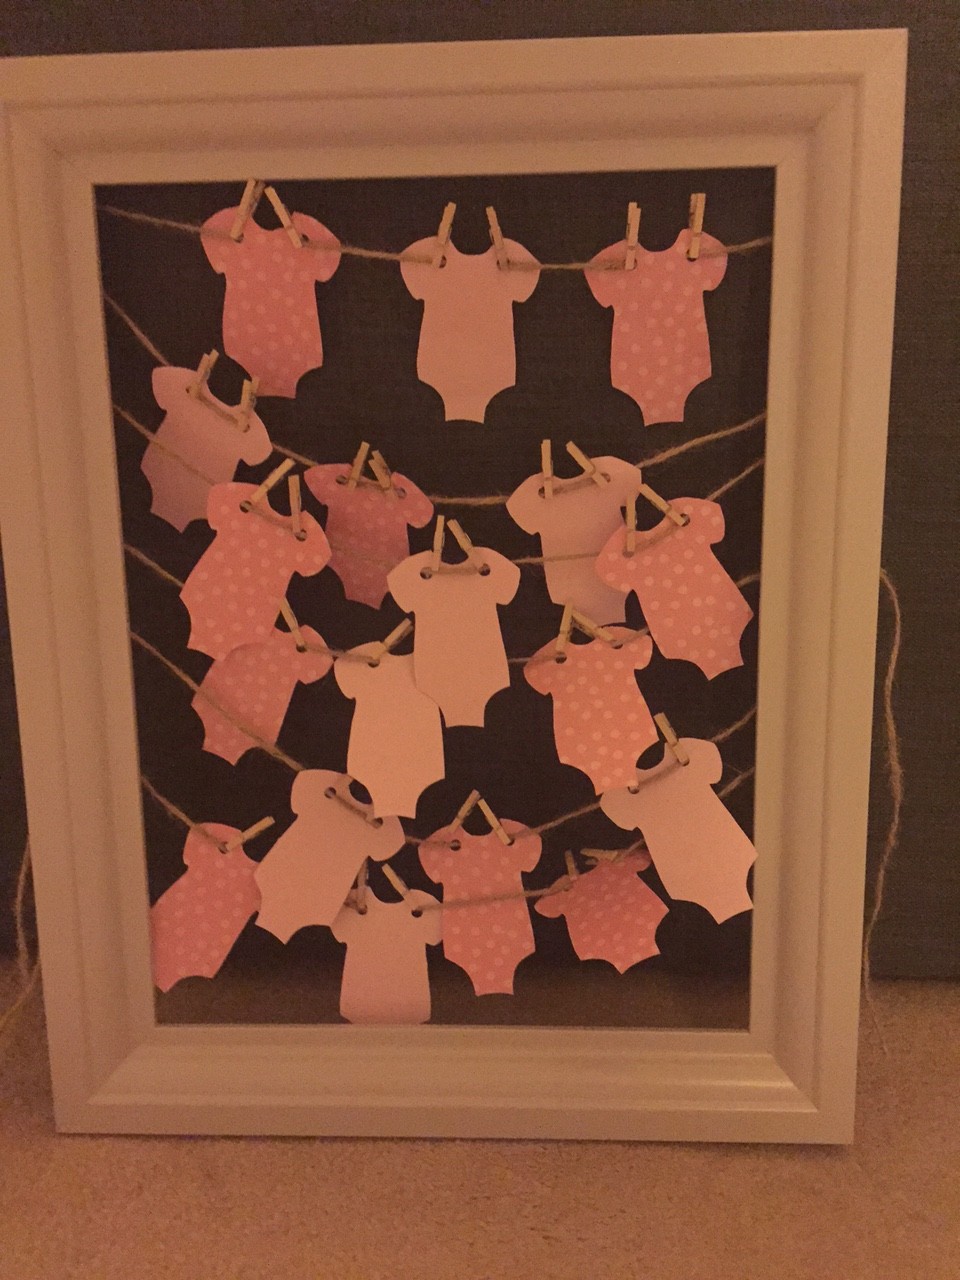
Bespoke guestbook
Would you believe I also made a guestbook, based on a pic I had seen on Pinterest for the baby shower yesterday – you see this is what happens when I don’t party of a weekend. Will confirm the process for this in next post…x