
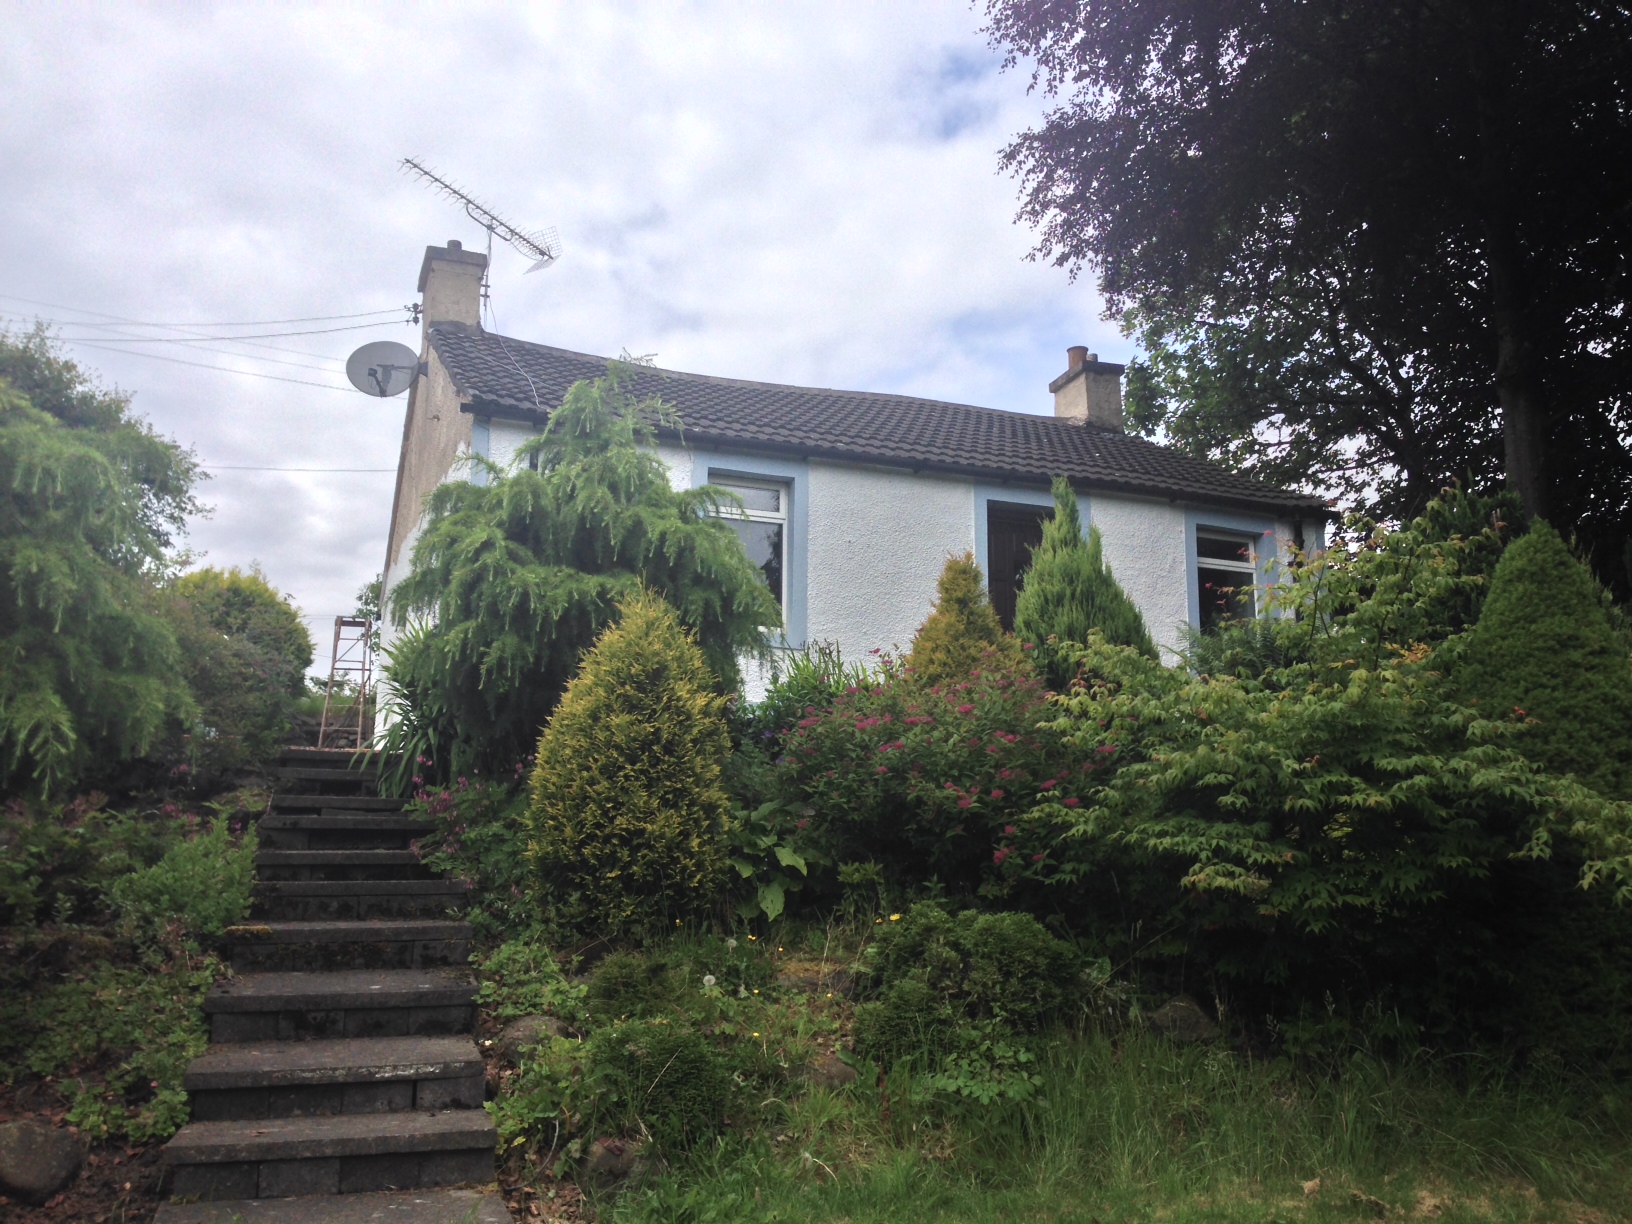


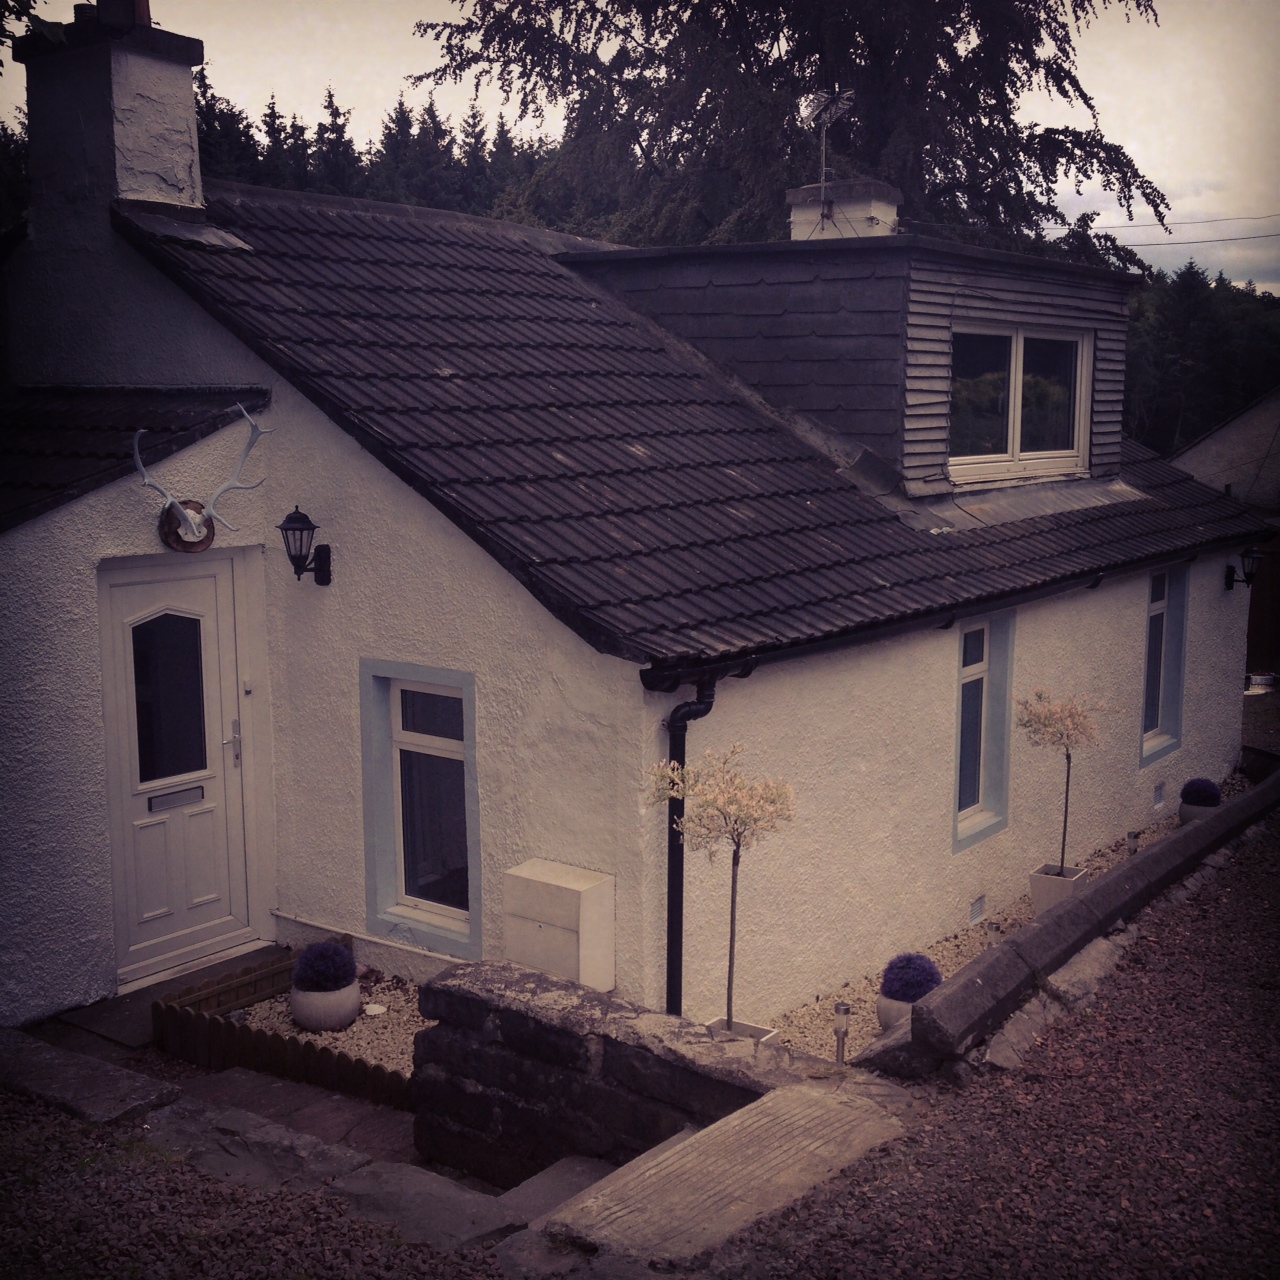
Lee and I stay in a cottage in Cumbernauld – 185 years old it was one of the first houses built in the town. It’s like a little shoe box (little being the operative word) but exudes a happy feeling. Located down a cemetery road, next to some fields and forestry, the cottage is a bit out of the way – there are only four other cottages around us and it is this feeling of remoteness which adds to the character of the place.
Lee purchased the house from an older lady and so the overall look was very much so on the retro end of the décor spectrum – olive coloured toilet suite, grass green wallpaper, beige external walls, beige internal walls…you get the picture. A right wee project, we started working on it when I moved in six months later and there is still so much to do!
The only thing I wasn’t originally keen on was the fact that the cottage lies a stone’s throw from a cemetery. You can’t see it from the house and it is veiled by a forest, but in the winter months, when you drive towards the house the grave stones are a prominent feature of the vista before you get to the cottage road. Graveyards have always made me feel a bit uneasy, although I would largely call myself an atheist, I do still seem to have a belief in the spirits of people living on and so I guess I have always seen them as being haunted and pretty eerie places. Since we got Haggis however, walking through the cemetery has become part of the route we do and has enabled me to get over this pretty irrational fear.
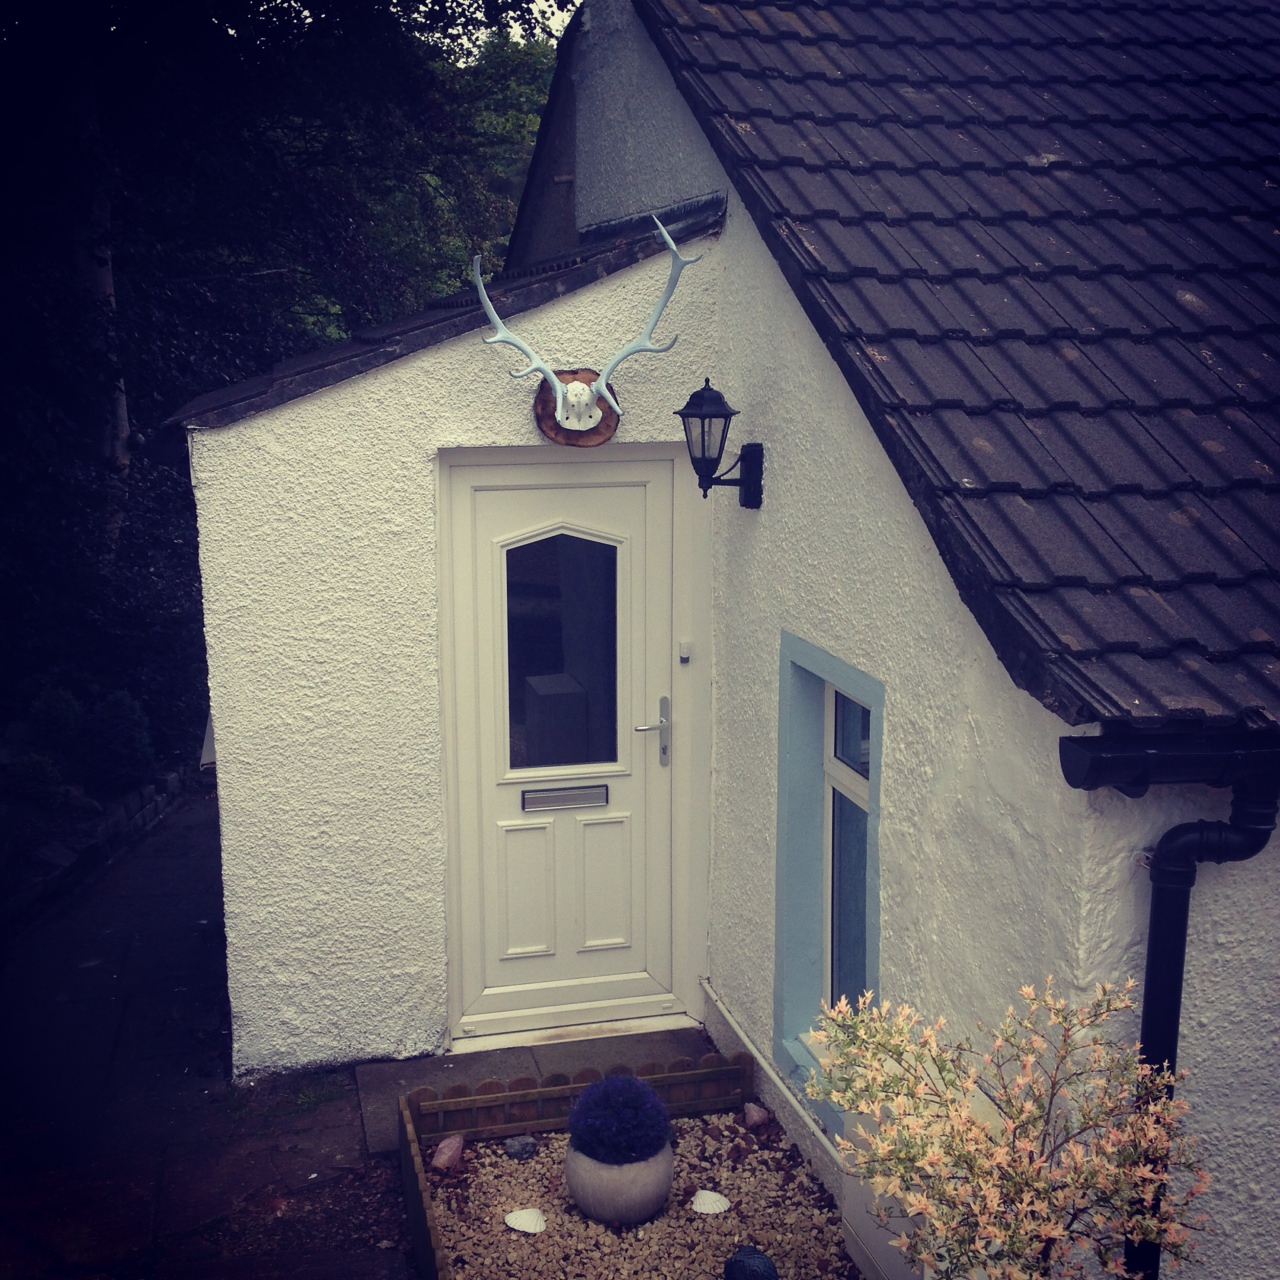
This fear – however irrational – must of been shared by people in the olden days, when apparently those residing close to graveyards would nail stag antlers over their front doors as a way of defending their home from any bad spirits from the cemetery. Although a story shared by an old neighbour, which could of course be an old wives tale, our cottage came complete with antlers and so I like to believe they work their magic regardless.
The plan this weekend was to paint the outside of the cottage. With the wedding out of the way, Lee and I have made a deal to focus our time and funds on home improvements and so any tips I can glean from this along the way, I promise to share. I must apologise if any upcoming tips are obvious, but being a right blondie when it comes to DIY, this all comes as a learning to me and with Lee being a tradesmen, I may even be able to impart some ‘insider secrets’.
Tips & Info to help you paint the exterior of your house
There are all types of finish to a house: brick, stone, roughcast (this is where a house is covered in an adhesive and then little stones are fired at it) and wetcast (a stippled concrete effect) and generally it is wetcast that you’ll want to paint. Follow the below steps and this should keep you on the straight and narrow…
- Use the weather forecast to help schedule in a few days that will give you a good run of painting – paint won’t stick in the rain and will dry very slowly in cold weather
- For concrete and brickwork you need to use masonry paint and Lee advises the best paint in the market to use is Santex. Beware this is about £53 (excl. VAT) and for our little casa we needed three pots. However, if you have any tradesmen friends with an account at the likes of Beatsons, they can get you a pot of Santex for £33 (inc. VAT) so a bit of sweet talking could help you save about £60! However worry not if you do not have a friendly contact in the building trade, you can also get good masonry paint from the likes of B&Q and Homebase
- The day before painting, you have to power wash the walls of your house in order to get rid of the dirt and dust
- When dry, you must bond the walls with diluted PVA glue (again you can get this from DIY stores like B&Q and Homebase). The percentage water to glue will be listed on the tin and this must be painted on the walls 24 hours in advance to the paint, in order to ensure it adheres to the surface
- At this point if you spot any major cracks in your walls use a water and cement mix to fill these in with a trowel – the PVA glue from the step above will also help bond this cement. If like Lee and I’s house, the cracks you have are very small, they can simply be filled in with paint
- To apply the paint, use masonry brushes (you can purchase a medium brush from B&Q for £3.50 and a large brush for £5 – don’t spend too much money on more expensive brands, own brand are just as good when it comes to the bristles of these brushes – unlike the cheaper brushes for interior walls that seem to moult all over the place)
- Now you are ready to rock, I would highly recommend inviting any friends and family over for a painting party. Whether you dress this up as a BBQ and then casually hand them overalls and brushes as they arrive or even give them advance warning, you can easily turn a tedious task into a rather fun one with cocktails and good grub to enjoy as you work and on your breaks
- If it is an overly sunny day, painting with a bright white colour can get pretty intense on your eyes and so be sure to wear sunglasses and of course suncream. Although it was pretty cloudy today, I swear the sun has reflected off the wall leaving me with a bit of a burnt face
- When you have finished be sure to wash out your bushes (water will do the job for masonry paint but if you have used an oil based paint, your brushes will need to cleaned with water and then soaked in white spirit for about an hour)
Following the above steps, you really have to be prepared to be covered in paint, that one or a few of your nails will probably break and that your muscles are very likely to seize up on the days that ensue. Sounds rubbish, I know. But try to remember that the silver lining comes from the fact the results of your hard work will be well worth it and home improving really is good exercise. Honestly I woke up this morning and my biceps seemed considerably more sculpted.
We (my mum and dad were the lucky folks invited to our painting party) rounded off the painting by giving our stag antlers a bit of a makeover, they must of been as old as the house and so the antlers themselves had turned a rusty colour. As I was about to start painting, I noticed some symbols on the skull of the antler, which you can see in the pic above. Unsure if these are man-made or insect made, I was really conscious of trying to smudge the paint out of these symbols so they are still prominent, and truly hope that by painting these I have not unleashed some kind of ancient curse.
Any tips I learned from painting antlers would really focus upon not painting both antlers in an area that you can’t leave them to dry. Your pet could end up covered in paint; then of course your hands will be covered as you try to pull it away from that curious pet who keeps going back to it; you might even rub your aye in annoyance with your paint covered paw; then as you put the antlers down, gutted at the sequence of events and slightly blinded with a stinging eye; you then trip over the antlers and have to paint them all over again…On reflection I might do a bit of research on the consequences of painting over sacred symbols!
One of the things we are yet to do with the cottage is to name it. As it stands we seem to share the same name as a cottage across the road, which can cause havoc with the mail, not only that but it really is a pretty unimaginative name: Eastfield Cottage. We have looked into the process for updating the title and the council have instructed that we would not need to register the new name with them, but rather with the Royal Mail so the name is in the ‘postal system’. One to remember should you decide to name or rename your own home.
Lee is happy to leave this decision up to me and I have to say I really am leaning towards Hogwarts (what with my intense love and fascination of the boy wizard) but I am not sure if this breaches some kind of copyright laws…so reckon we could end up with a title involving the word ‘Tartan’. I really did have to fight against an intense urge to use pink as the framing colour for the cottage (as opposed to the baby blue we currently have) and so feel a title like ‘Tartan HQ’ could work…
Some further tips on home improvements to follow in future posts! x
Comments
David maginess
28/06/2014
Lovely job Laura!!
Hope Lee kept your glass topped up whilst you were working!
pinktartandoll
28/06/2014
Thank you! He did indeed 🙂 x